What size of roofing nails should I use? This crucial question demands a deep dive into material properties, nail types, and installation techniques. Choosing the right roofing nail is paramount for a durable and long-lasting roof. This guide unpacks the complexities of nail selection, ensuring you make informed decisions that safeguard your investment.
Roofing nails come in various sizes, gauges, and materials, each with specific strengths and weaknesses. Understanding these differences is key to selecting the appropriate nail for your roofing project. This guide walks you through the crucial factors to consider, empowering you to confidently tackle your roofing needs.
Material Properties and Types
Choosing the right roofing nails is crucial for a durable and long-lasting roof. Understanding the properties of different roofing materials and the types of nails available allows you to make informed decisions. This ensures a strong, weather-resistant installation that protects your home from the elements. Consider the material of your roofing deck, the type of roofing material, and the available nail types to achieve optimal performance.Roofing materials vary significantly in their inherent strength and durability, which directly impacts the required nail characteristics.
Selecting nails appropriate for both the roofing material and the underlying deck is essential for longevity and structural integrity. This section delves into the specifics of these materials and their associated nail requirements.
Roofing Material Strength and Durability Comparison
Different roofing materials possess varying degrees of strength and resistance to weather. This comparison helps determine the appropriate nail type for each.
| Roofing Material | Strength | Durability | Typical Nail Requirements |
|---|---|---|---|
| Asphalt Shingles | Moderate | Moderate | Galvanized steel, coated nails with appropriate head styles for shingle penetration. |
| Metal Roofing (Steel, Copper, Aluminum) | High | Very High (depending on metal type) | Galvanized, stainless steel, or coated nails designed for metal; often with larger head styles for better grip. |
| Slate Roofing | High | Very High | Stainless steel or coated nails with a large head style to ensure secure fastening. Often require specialized nail types and larger hole diameters in the slate to accommodate the nail’s head. |
Types of Roofing Nails
Various types of roofing nails are available, each with specific properties suitable for particular roofing materials.
Understanding the different types of roofing nails—galvanized, stainless steel, and coated—is key to selecting the correct one for your specific project. The choice depends on the roofing material and the surrounding environment.
| Nail Type | Material | Description | Suitability |
|---|---|---|---|
| Galvanized | Zinc-coated steel | Provides corrosion resistance. | Widely used for asphalt shingles, and some metal roofing. |
| Stainless Steel | Stainless steel alloys | Excellent corrosion resistance, suitable for harsh environments. | Ideal for metal roofing, slate, and high-corrosion areas. |
| Coated | Steel with various coatings | Provides corrosion resistance, often with enhanced durability. | Suitable for a variety of roofing materials, offering a balance of cost and performance. |
Importance of Roofing Deck Material
The material of the roofing deck significantly impacts nail selection. Different decking materials have varying thicknesses and strengths, requiring specific nail sizes and types for optimal fastening. For example, a thick plywood deck may tolerate larger nails than a thin OSB deck.
Relationship Between Nail Type, Head Style, and Material
Nail type, head style, and material are interconnected. The head style of a nail directly affects its ability to hold the roofing material in place. For instance, a large head style on a galvanized nail is necessary to secure a heavy slate shingle. The material of the nail determines its resistance to corrosion and its ability to withstand the stresses of the roof.
Roofing Nail Sizes and Gauge: What Size Of Roofing Nails Should I Use
Choosing the right roofing nails is crucial for a durable and long-lasting roof. Incorrect nail size can lead to premature failure, costly repairs, and even safety hazards. Understanding the relationship between nail gauge, material thickness, and the specifics of your roofing materials is essential for a successful installation. This guide provides a clear breakdown of nail sizes, gauges, and their appropriate applications.The gauge of a roofing nail directly correlates to its thickness.
A higher gauge number indicates a thinner nail, while a lower gauge number signifies a thicker nail. Understanding this relationship allows you to select the appropriate nail for the specific roofing materials and sheathing thicknesses you’re working with. Proper nail selection ensures a strong and secure roof that can withstand the elements.
Standard Roofing Nail Sizes and Gauges
Proper nail selection ensures a strong and secure roof that can withstand the elements. This table Artikels common roofing nail sizes and gauges, along with examples of appropriate uses:
| Gauge | Size (Approximate in mm) | Common Uses |
|---|---|---|
| 10 | 3.2 mm | Light-duty roofing applications, such as shingles or underlayment where high tensile strength isn’t critical. |
| 12 | 2.9 mm | Moderate-duty roofing applications, including asphalt shingles and some metal roofing. Suitable for moderately thick sheathing. |
| 14 | 2.6 mm | Suitable for applications where a balance of strength and economy is desired, often used in situations with lighter-weight roofing materials or thinner sheathing. |
| 16 | 2.3 mm | Heavy-duty applications, such as metal roofing, especially when higher tensile strength is required. |
| 18 | 2.0 mm | Extremely light-duty roofing applications, such as some specialized underlayment or lighter-weight shingles. |
Nail Gauge and Material Thickness
The relationship between nail gauge and material thickness is crucial. Thicker materials require thicker nails to provide adequate holding power. A thinner nail in thick sheathing will bend or break, leading to weak points in the roof structure. Conversely, a thick nail in thin sheathing might damage the material, creating unnecessary stress points.
Determining the Correct Nail Gauge
Choosing the correct nail gauge depends on a combination of factors. First, consider the type of roofing material. Different roofing materials have varying thicknesses. Next, evaluate the thickness of the sheathing. If the sheathing is thin, a lower gauge nail (thicker) is not necessary.
Choosing the right roofing nail size is crucial for a secure and long-lasting roof. But before you get lost in the details of gauge and length, have you considered planning a memorable 10 year old birthday party? Finding the perfect venue in Melbourne for a bash is a challenge, and exploring options like 10 year old birthday party places melbourne will give you great ideas.
Ultimately, the correct nail size depends on the type of roofing material and the weight of the shingles, so do your research! Don’t rush this part, a strong roof is key.
A lower gauge nail may not be required for the sheathing.
Select a nail gauge that is strong enough to penetrate the sheathing and roofing material without bending or breaking, while ensuring it does not damage the materials.
Nail Length and Roofing Material
Nail length is also a critical consideration. The nail must penetrate the underlayment and roofing material sufficiently to create a strong hold. If the nail is too short, it may not reach the necessary depth in the sheathing, compromising the roof’s integrity. Conversely, excessively long nails can create stress points and potentially damage the roofing material. The optimal nail length is determined by the combined thicknesses of the underlayment and roofing material.
Factors Affecting Nail Selection
Choosing the right roofing nails is crucial for a durable and long-lasting roof. Incorrect nail selection can lead to premature failure, leaks, and costly repairs. This section delves into the key factors influencing nail choice, ensuring you select the optimal nails for your specific roofing project.Understanding these factors allows for a more informed decision-making process, ultimately saving time and money while improving the overall structural integrity of your roof.
Roof Pitch and Nail Penetration
Roof pitch significantly impacts nail penetration and holding strength. Steeper pitches require longer nails to achieve adequate penetration into the decking material, while shallower pitches necessitate shorter nails. This is because the angle of the roof affects how deeply the nail can be driven into the substrate.
| Roof Pitch | Nail Length Considerations | Impact on Holding Strength |
|---|---|---|
| Very Steep (e.g., 6/12 or greater) | Longer nails needed for deep penetration. | High holding strength is crucial for resisting wind uplift and snow loads. |
| Moderate (e.g., 4/12 to 6/12) | Medium-length nails are typically sufficient. | Adequate holding strength is important for resisting wind uplift and snow loads. |
| Shallow (e.g., 2/12 or less) | Shorter nails with sufficient penetration into the deck are required. | Lower holding strength is still important to withstand wind uplift and water penetration. |
Roofing Deck Material and Nail Size
The material of the roofing deck plays a vital role in nail selection. Different materials have varying densities and strengths, influencing the required nail size. For instance, plywood decks might necessitate thicker nails compared to OSB (Oriented Strand Board) decks, given the differences in material strength and structural integrity.
Type of Roofing Material and Nail Gauge
The type of roofing material directly affects the required nail size and gauge. Asphalt shingles, for example, often require smaller-gauge nails than metal roofing, which necessitates heavier-duty nails for long-term durability. Metal roofing, particularly standing seam or corrugated, needs nails with higher tensile strength to withstand wind uplift forces.
Wind Load and Nail Strength
Stronger nails are essential in high-wind areas to resist uplift forces. Increased wind load necessitates nails with greater tensile strength and longer lengths to ensure adequate anchorage. In areas prone to significant wind, using galvanized or stainless steel nails is strongly recommended to further enhance durability. Examples include coastal regions or areas with a history of high-velocity winds.
Consult local building codes for specific wind load requirements.
Nail size selection should always consider the local wind load requirements.
Installation Techniques and Procedures
Proper roofing nail installation is crucial for a durable and weather-resistant roof. Incorrect installation can lead to premature failure, leaks, and costly repairs. This section details the correct procedure for driving roofing nails, emphasizing crucial aspects like angle, depth, and preventative measures against damage.Careful attention to detail during installation significantly impacts the longevity and performance of a roof.
The correct technique for driving roofing nails minimizes the risk of splitting the sheathing or the roofing material itself. Different nail-driving tools offer varying degrees of control and efficiency, and understanding their strengths and limitations is vital for optimal results.
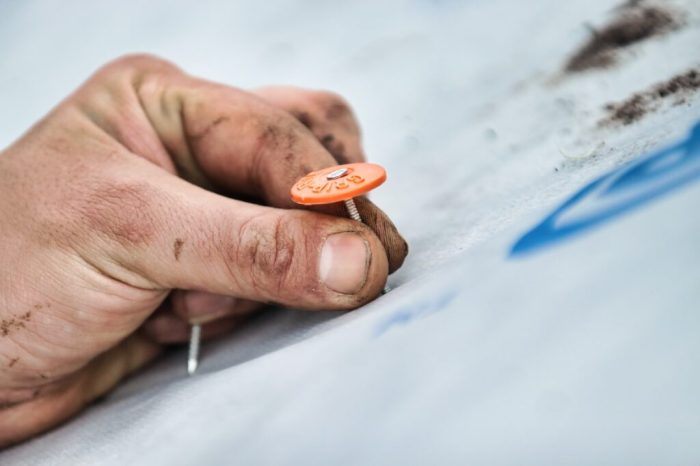
Driving Roofing Nails
Properly driving roofing nails involves a methodical approach, focusing on precision and control. The goal is to achieve a secure fastening without compromising the integrity of the roofing materials.
- Prepare the Nail and Sheathing:
- Determine the Angle:
- Controlled Impact:
- Check the Depth:
- Finishing Touches:
Ensure the nail is the correct size for the application and that the sheathing is clean and dry. Remove any debris or dirt that could impede proper insertion. A clean surface allows for a more secure hold and prevents potential rusting.
Drive the nail at a slight angle, usually between 15 and 30 degrees from the perpendicular to the sheathing. This angle helps distribute the force of the nail, preventing splitting and ensuring a strong hold. The exact angle depends on the nail type and the specific roofing material.
Apply even pressure when driving the nail. Avoid hammering with excessive force, which can damage the roofing material or the sheathing. A controlled impact ensures a precise and secure installation. A hammer with a soft striking face will reduce the risk of damaging the roofing material.
Drive the nail to the appropriate depth. The nail should be fully seated into the sheathing but not penetrate the roofing material. This prevents the roofing material from tearing and ensures a watertight seal. Check the manufacturer’s specifications for appropriate nail depth.
Once the nail is fully seated, carefully remove any excess material around the nail head. Use a nail set to set the nail head flush with the surface of the sheathing. This helps prevent water from accumulating and promotes a clean, professional finish.
Angle and Depth Considerations
The angle and depth at which roofing nails are driven are critical to their effectiveness and the overall structural integrity of the roof.
- Angle: Driving nails at an angle of 15-30 degrees from perpendicular to the sheathing is the standard practice. This prevents splitting of the sheathing and provides better holding power. An incorrect angle can result in the nail bending or the sheathing cracking.
- Depth: Nails should be driven to a depth that fully seats them into the sheathing but does not penetrate the roofing material. Driving nails too deep can damage the roofing material, creating vulnerabilities for water leakage. Over-driving also weakens the structural integrity of the roof.
Preventing Nail Splitting and Damage
Implementing preventative measures is essential to avoid damaging the roofing material and causing potential leaks. The right tools and techniques significantly reduce the risk of these issues.
- Proper Nail Selection: Choosing the right size and type of nail for the application is paramount. A nail that is too small will not provide adequate holding power, while a nail that is too large can damage the roofing material.
- Controlled Driving: Maintaining a consistent, controlled hammering action minimizes the risk of over-driving and damage to the roofing material. Too much force can cause the nail to bend or split the material. Use the correct tool and technique to minimize the risk of splitting or bending the nail during driving.
- Nail Setting: Setting the nail head flush with the surface of the sheathing is a crucial step in preventing damage. A nail set or similar tool should be used to achieve this. A properly set nail head prevents water accumulation and provides a clean, professional finish.
Nail Driving Tools
Different nail-driving tools offer varying levels of control and efficiency. Understanding the characteristics of each tool is crucial for achieving optimal results.
| Tool | Description | Effectiveness |
|---|---|---|
| Claw Hammer | A versatile tool for general hammering tasks. | Suitable for smaller projects, but can be less precise than specialized tools. |
| Nail Gun | Pneumatic or electric tools that drive nails with compressed air or electricity. | Efficient for large projects, providing greater speed and consistency. |
| Finish Hammer | Small hammer with a soft face. | Ideal for finishing tasks, minimizing the risk of damage to roofing material. |
Troubleshooting and Common Mistakes
Choosing the right roofing nails is crucial for a long-lasting and weather-resistant roof. However, even with the best selection, improper installation or unsuitable nail choices can lead to costly repairs and potential structural damage. Understanding potential problems and their solutions is vital for maintaining a sound roof.Common errors in roofing nail installation often stem from misjudging nail size, type, or the underlying substrate.
This can lead to premature failure, leaks, and the need for costly repairs. Proper diagnosis and resolution are key to avoiding these issues.
Common Roofing Nail Problems and Solutions
Understanding the symptoms of improperly installed roofing nails is essential for prompt resolution. A proactive approach to identifying these issues can prevent more significant problems and save money in the long run.
- Nail Pops: Nail pops, where the nail head pulls out or the nail itself breaks, are a common roofing issue. Causes include using nails that are too small for the application, insufficiently driven nails, or using nails not appropriate for the specific roofing material. Solutions include using the correct nail size for the material and substrate, ensuring the nail is fully driven, and checking the condition of the roofing material for possible weakening or deterioration.
Using galvanized nails or specialized weather-resistant nails can also help.
- Leaks: Leaks in a roof can have several origins, one of which is improperly installed roofing nails. If the nail is not fully seated or the nail hole is not adequately sealed, water can seep into the roof structure. Correcting leaks often involves identifying the source of the leak and replacing or repairing the damaged sections of the roof, including ensuring all nails are fully driven and properly sealed.
Using weather-resistant roofing materials and high-quality roofing nails can reduce the risk of leaks.
- Nail Head Damage: Damage to the nail head, such as excessive bending or splitting, can be a sign of improper hammering or the use of the wrong nail type. This could also be due to the hardness of the substrate, or excessive force. Replacing the damaged nails and checking the hammering technique are necessary steps to avoid this problem. Using a proper nail gun with correct settings for the material and substrate can prevent this problem.
- Loose or Missing Shingles: Loose or missing shingles can result from improperly driven nails. This can cause water damage, which can compromise the integrity of the roof. Solutions include re-driving the nails and checking the condition of the shingles for potential damage, and replacing the damaged shingles. Using specialized roofing sealant can also help secure the shingles.
Symptoms of Improperly Installed Roofing Nails and Their Solutions
A systematic approach to inspecting the roof can identify potential issues before they escalate. This includes regular inspections to detect early warning signs.
| Symptom | Potential Cause | Solution |
|---|---|---|
| Nail pops | Wrong nail size/type, insufficient hammering, weak substrate | Use correct nail size, ensure full seating, consider using specialized weather-resistant nails, and address substrate issues |
| Leaks | Loose or improperly seated nails, improper sealing, damaged roofing material | Identify the leak source, re-drive nails, seal nail holes, repair or replace damaged roofing materials, use sealant |
| Nail head damage | Excessive hammering force, inappropriate nail type for substrate | Use proper hammering technique, select appropriate nail type, check the hardness of the substrate, and replace damaged nails |
| Loose or missing shingles | Improperly driven nails, weak shingles, or substrate issues | Redrive nails, check and replace damaged shingles, ensure appropriate nails and sealant |
Preventing Nail Pops and Other Roofing Issues, What size of roofing nails should i use
A proactive approach to roof maintenance can significantly reduce the risk of costly repairs.
- Using the Right Nail Size: Always use the correct nail size for the roofing material and substrate. Consult the manufacturer’s recommendations for specific guidelines.
- Proper Driving Technique: Use a proper driving technique and avoid hammering nails too hard or at an angle. Ensure the nail is fully seated.
- Quality Roofing Materials: Choose high-quality roofing materials and nails that are designed to withstand weather conditions and potential substrate issues.
- Regular Inspections: Regularly inspect the roof for signs of damage, such as nail pops, leaks, or loose shingles. Addressing minor issues early can prevent major problems.
Safety Precautions

Roofing work, while rewarding, can be hazardous. Proper safety precautions are crucial to preventing injuries and ensuring a safe working environment. Neglecting safety measures can lead to significant physical harm and costly repairs or replacements.Understanding and adhering to safety protocols when working with roofing nails and tools is paramount. A comprehensive approach to safety includes proper gear, awareness of potential hazards, and adherence to established procedures.
Choosing the right roofing nail size depends heavily on the type of roofing material, and the thickness of the wood. Delving into the intricacies of food and culture, especially in the 7th edition of food and culture 7th edition , reveals fascinating insights into how cultural traditions influence dietary choices. Ultimately, for a secure and long-lasting roof, consult the manufacturer’s recommendations for the optimal nail size.
This ensures a smooth and injury-free roofing project.
Essential Safety Gear
Implementing a safety-first approach requires using appropriate personal protective equipment (PPE). Safety gear protects against various hazards inherent in roofing work. A comprehensive PPE kit is essential for worker well-being.
- Eye Protection: Safety glasses or goggles are vital to shield the eyes from flying debris, such as nails or pieces of roofing material. This protects against potential eye injuries, including scratches, punctures, and chemical exposure. Examples include impact-resistant safety glasses or goggles designed for construction work.
- Hearing Protection: Roofing tools, such as nail guns and hammers, can generate significant noise levels. Prolonged exposure to loud noises can lead to hearing damage. Hearing protection, like earplugs or earmuffs, is essential to safeguard hearing health.
- Hand Protection: Gloves provide protection for hands when handling nails, tools, or materials. This prevents cuts, punctures, and abrasions. Choose gloves appropriate for the task, such as leather work gloves for handling nails or nitrile gloves for chemical protection.
- Foot Protection: Steel-toe safety boots or work shoes provide essential protection for feet. They protect against falling objects, sharp edges, and potential punctures. Proper footwear is crucial for maintaining stability and preventing injuries.
- Head Protection: A hard hat protects the head from falling debris or objects. This safeguards against serious head injuries. A properly fitted hard hat is essential for worker safety.
Risks of Damaged or Blunt Tools and Nails
Using damaged or blunt tools and nails can significantly increase the risk of accidents. Improperly maintained or damaged equipment can cause unexpected malfunctions or uncontrolled actions, leading to serious injuries. The same applies to nails.
- Damaged Nails: Bent, damaged, or improperly formed nails can cause the nail gun to malfunction or misfire. This can lead to the nail ricocheting, causing injuries to the user or nearby personnel. Always inspect nails for defects before use.
- Blunt Tools: Blunt tools require more force to perform their intended tasks, increasing the risk of slips, strains, and injuries. This is particularly true for tools such as hammers or nail guns.
- Improper Nail Size: Using the incorrect size of nails can also lead to issues. Using oversized nails can damage the roof or create uneven surfaces, while undersized nails may not provide adequate holding strength, leading to future problems.
Safety Tips for Roofing Work
Adhering to a set of safety tips during roofing work can drastically reduce the chances of accidents. Following these precautions can prevent many avoidable injuries.
- Regular Tool Maintenance: Regularly inspect and maintain roofing tools. Ensure all parts are functioning correctly and free of defects. This is crucial to preventing unexpected malfunctions and injuries.
- Proper Nail Handling: Store nails securely in designated containers. Handle nails with care to avoid dropping or scattering them. Always use appropriate tools and techniques when working with nails to prevent injuries.
- Clear Work Area: Keep the work area clean and organized. Remove any potential hazards, such as debris or tools. This helps maintain a safe working environment.
- Work in Teams: Work with a team to ensure safety and support. Teamwork allows for better communication, support, and assistance in the event of an emergency.
- Proper Lifting Techniques: Use proper lifting techniques to avoid strains or injuries. This is important when lifting materials or tools. Consult safety guidelines for correct procedures.
- Weather Awareness: Check the weather forecast before starting work. Avoid working in adverse weather conditions. This is crucial for safety and job completion.
- Proper Training: Ensure all personnel involved in roofing work have received adequate safety training. Training is crucial to understand potential risks and proper safety measures.
Estimating Nail Requirements
Accurately estimating the number of roofing nails needed for a project is crucial for both cost efficiency and avoiding material shortages. Overestimating leads to waste, while underestimating can result in costly repairs or the need to return to the site for additional materials. A precise calculation ensures a smooth and efficient installation process.
Calculating Nail Requirements
Estimating nail requirements involves several key factors, primarily the roof’s surface area and the specific nail specifications. Understanding the relationship between these factors allows for precise estimations. A common method involves calculating the total area of the roof to be covered and then applying a per-square-foot nail density.
Nail Density Per Square Foot
Determining the appropriate nail density depends on the roofing material and the installation method. Different types of roofing materials (e.g., asphalt shingles, metal roofing) have varying nail-holding capacities. This factor, along with the roof pitch, directly influences the nail density required. A steeper roof pitch may require more nails to secure the roofing material effectively, as the increased angle creates more stress on the fasteners.
It’s important to refer to the manufacturer’s specifications for the specific roofing material to ensure optimal nail spacing and density.
Calculating Nail Length
Nail length is directly correlated to the roofing material’s thickness. A thicker roofing material requires a longer nail to penetrate sufficiently and provide adequate holding power. A shorter nail might not penetrate the material’s full depth, resulting in a weaker and potentially hazardous installation. Roof pitch also influences nail length requirements. Steeper pitches can affect the penetration depth needed for secure fastening.
Consult manufacturer recommendations or roofing professionals for the most accurate guidelines.
Example Calculation
A 1000 square foot roof with asphalt shingles (typical thickness) requiring 1 nail per square foot would need approximately 1000 nails. If a steeper pitch or a different material with greater thickness is used, this number may need to be adjusted according to the material’s specifications. The length of the nail will also need to be adjusted to match the material thickness.
Overlap and Spacing
Proper overlap and spacing between nails are critical for maintaining structural integrity and preventing leaks. Insufficient overlap can lead to gaps where water can penetrate, while excessively close spacing may damage the roofing material. Manufacturers often provide specific recommendations for both overlap and spacing. These recommendations are crucial to follow for optimal performance and safety.
“Following manufacturer guidelines for overlap and spacing is essential to prevent leaks and maintain the roof’s structural integrity.”
These guidelines usually come in the form of charts or diagrams that specify the appropriate spacing based on the roofing material and pitch.
Using Roofing Calculators
Roofing calculators are readily available online and in various roofing software programs. These tools provide a quick and efficient way to calculate the required number of nails based on roof dimensions, material type, and other relevant factors. Using these tools can significantly reduce the potential for errors in estimating nail requirements.
Final Review
In conclusion, selecting the right roofing nails is more than just a matter of size; it’s about considering the interplay of materials, installation techniques, and safety precautions. This comprehensive guide provides the knowledge needed to make informed choices, ensuring a strong, durable, and long-lasting roof. Remember, proper nail selection and installation are vital for a successful roofing project.
FAQ Compilation
What’s the difference between galvanized and stainless steel roofing nails?
Galvanized nails offer good rust resistance, suitable for most residential applications. Stainless steel nails provide superior corrosion resistance, ideal for harsh climates or high-end projects.
How do I determine the correct nail length?
Nail length should extend at least through the underlayment and into the sheathing by a significant margin. Consider the roof pitch and material thickness when calculating the appropriate length.
What are common mistakes when driving roofing nails?
Driving nails at an improper angle or too deep can damage the roofing material. Ensure nails are driven straight and to the correct depth to avoid splitting or puncturing the roofing surface.
What safety precautions should I take when working with roofing nails?
Always wear safety glasses, gloves, and sturdy footwear. Inspect nails for damage before use. Ensure proper ventilation and work in daylight when possible.
