Recipes with active sourdough starter are taking the culinary world by storm. From crusty loaves to chewy pizzas, the possibilities are endless with this ancient technique. This guide dives deep into the world of sourdough, exploring its history, benefits, and a range of recipes.
This comprehensive resource provides a detailed look at sourdough starters, from choosing the right type to maintaining and feeding them. We’ll also examine a wide array of recipes, from simple bread to sourdough pizzas, highlighting variations and techniques.
Introduction to Sourdough Recipes
Sourdough bread, a staple in many cultures for centuries, boasts a rich history intertwined with the art of fermentation. Its origins are shrouded in antiquity, with evidence suggesting its development alongside the domestication of grains. Early bakers likely stumbled upon the process of spontaneous fermentation, using naturally occurring wild yeasts and bacteria in the flour and water to leaven their dough.
This process, relying on active starter cultures, led to the unique flavor and texture of sourdough, distinguishing it from other breads.The use of an active sourdough starter offers several advantages over other baking methods. This symbiotic relationship between flour, water, and wild microorganisms results in a bread with a complex flavor profile, a distinctive tang, and a noticeably chewy texture.
Sourdough’s fermentation process enhances the bread’s digestibility, increasing the breakdown of complex carbohydrates and improving nutrient absorption. Moreover, the natural enzymes and acids produced during fermentation can contribute to a more nutritious and flavorful end product.
Types of Sourdough Recipes
Sourdough is not limited to bread. The active starter culture can be utilized in a variety of recipes, extending beyond the classic loaf. A diverse range of sourdough recipes includes sourdough pizza crusts, which offer a unique and satisfying chewy texture to the pizza. Sourdough pancakes, with their airy and subtly tangy flavor, offer a delicious breakfast or brunch option.
These applications demonstrate the versatility of sourdough, showcasing its adaptability to various culinary needs.
Nutritional Comparison of Sourdough and Traditional Bread, Recipes with active sourdough starter
The fermentation process in sourdough significantly impacts its nutritional profile. This table highlights key differences between sourdough bread and traditional bread, emphasizing the benefits of sourdough.
| Feature | Sourdough Bread | Traditional Bread |
|---|---|---|
| Fiber Content | Higher | Lower |
| Vitamins | Higher | Lower |
| Minerals | Higher | Lower |
| Digestive Health | Improved | Can be less beneficial |
The higher fiber content in sourdough bread aids in digestion, promoting satiety and contributing to a healthier gut microbiome. The enhanced vitamin and mineral content further contribute to its nutritional value. While traditional bread offers a satisfying experience, its lower fiber and nutrient density may not offer the same digestive benefits.
Types of Sourdough Starters

Sourdough starters, the heart of sourdough bread, come in various forms, each with unique characteristics. Understanding these variations allows bakers to select a starter best suited for their desired outcome and baking style. The composition of the starter, including the types of flour and water used, significantly impacts the starter’s behavior and the resulting bread’s flavor profile.Different starter types exhibit varying rates of activity and require adjustments in feeding schedules to maintain optimal health and vitality.
The choice of starter type, combined with meticulous maintenance, directly affects the quality and consistency of the final sourdough product. Understanding the nuances of different starter types empowers bakers to achieve desired results in their sourdough ventures.
Starter Composition and Ingredients
Different flour types significantly influence the characteristics of a sourdough starter. White flour starters, typically using all-purpose or bread flour, are generally considered easier to maintain due to their simpler composition. Rye flour starters, on the other hand, tend to be more robust and resilient, requiring slightly less frequent feedings. Whole wheat starters, utilizing whole wheat flour, often yield a slightly more complex flavor profile in the final bread due to their higher fiber content.
The specific flour used contributes to the overall taste, texture, and nutritional value of the final product.
Starter Maintenance and Care
Maintaining a healthy sourdough starter is crucial for achieving consistent results. Proper feeding, consistent temperature, and a clean environment contribute significantly to the starter’s longevity and vitality. Starter maintenance involves careful monitoring of its activity, including its rise, and adjusting feeding schedules accordingly. This meticulous care ensures that the starter remains active and healthy, ready for use in various baking endeavors.
Feeding Schedules and Their Impact
The frequency of feeding a sourdough starter directly impacts its activity and health. A daily feeding schedule is often ideal for white flour starters, which typically require more frequent nourishment to maintain their activity level. Rye flour and whole wheat starters, due to their inherent resilience, often thrive on a less frequent feeding schedule, typically every 2-3 days.
Adjusting the feeding schedule based on the starter’s activity and the environment can optimize the starter’s health and vitality.
Adjusting the feeding schedule based on starter activity and environment is crucial.
Comparison of Starter Types
| Starter Type | Ingredients | Feeding Schedule | Notes |
|---|---|---|---|
| White Starter | Flour (e.g., all-purpose, bread) and water | Daily | Generally easier to maintain, faster activity rate. |
| Rye Starter | Rye flour and water | Every 2-3 days | More robust and resilient, slower activity rate. |
| Whole Wheat Starter | Whole wheat flour and water | Every 2-3 days | Higher fiber content, often produces a more complex flavor profile. |
Recipe Variations and Techniques
Sourdough bread, with its unique tang and chewy texture, offers a wide array of possibilities beyond the basic loaf. Understanding variations in shaping, leavening, and proofing is key to mastering this ancient art. This exploration delves into the intricacies of sourdough recipe development, empowering bakers to craft personalized and delicious results.This section will cover various techniques to tailor sourdough recipes to personal preferences, from the classic hearth-baked loaf to innovative pizza crusts.
By understanding the role of different leavening methods and proofing times, bakers can achieve consistent and satisfying outcomes.
Creating a Basic Sourdough Starter from Scratch
Establishing a robust sourdough starter is the foundation for all sourdough recipes. A healthy starter is characterized by a bubbly, slightly acidic, and active fermentation. The following process Artikels a reliable method for achieving this:
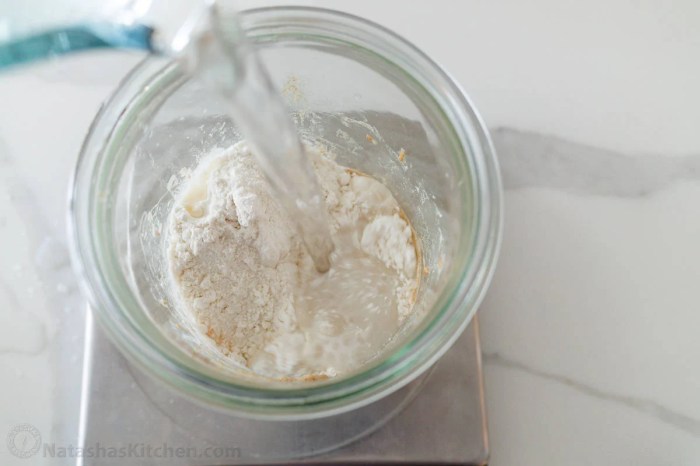
- Ingredients: Combine equal parts (by weight) of unbleached bread flour and filtered water. A ratio of 100 grams of each is a good starting point.
- Mixing: Gently mix the flour and water until a smooth slurry forms. Ensure no dry flour pockets remain.
- Feeding Schedule: Feed the starter daily, adding fresh flour and water in a 1:1 ratio. For example, if the starter requires 100 grams of flour and water, add 50 grams of each.
- Observation: Observe the starter’s activity. A healthy starter will display visible bubbles and a slightly sour aroma within 24-48 hours.
- Patience: This process requires patience. Consistent feeding and monitoring are essential to nurturing a thriving starter. A strong starter will take approximately 7-10 days to develop.
Methods for Shaping and Baking Sourdough Loaves
Various shaping methods can significantly impact the final loaf’s texture and appearance. The chosen method influences the development of the gluten network and the overall structure of the bread.
- The Fold-and-Turn Method: This technique involves folding the dough multiple times during the bulk fermentation phase. This promotes gluten development and creates a more uniform crumb.
- The Basket Method: The basket method involves shaping the dough into a round or oblong form and placing it in a banneton or proofing basket lined with a floured cloth. This technique helps retain the shape and structure of the bread.
- The Dutch Oven Method: This method utilizes a Dutch oven to provide a sealed environment for the dough to proof and bake. The high heat and steam retention produce a crust with a crispy exterior and a tender interior.
Different Leavening Techniques and Their Impact
The choice of leavening techniques significantly affects the flavor profile and texture of the final product.
- Bulk Fermentation: This crucial step allows the starter to develop the dough’s flavor and texture. It can be further divided into a first and second bulk fermentation stage, allowing the dough to develop more slowly and evenly.
- Proofing: Proofing times significantly affect the loaf’s final volume and texture. Appropriate proofing times should be adjusted based on the temperature and the specific starter’s activity. Excessive proofing can lead to a dense loaf, while insufficient proofing can result in a less risen product.
Step-by-Step Guide for Creating Sourdough Pizza Crust
This recipe Artikels a simple method for crafting a delicious sourdough pizza crust.
- Mix the dough: Combine the ingredients and knead until a smooth and elastic dough is formed. Add flour as needed.
- Bulk Fermentation: Allow the dough to rest for at least 6-8 hours to allow it to rise and develop its flavor. This step is critical for creating a chewy crust.
- Shape the crust: Gently stretch and shape the dough into a thin, circular crust. Use a pizza stone or baking sheet for optimal results.
- Proofing: Proof the crust for 30-45 minutes. This allows the dough to relax and rise slightly, further developing its texture.
- Baking: Bake in a preheated oven at a high temperature until the crust is golden brown and the toppings are cooked through.
Importance of Proper Proofing Times for Sourdough
Proofing times are crucial for the development of sourdough’s unique qualities. Insufficient proofing can lead to a dense, under-developed loaf, while excessive proofing can result in a flat, overly risen loaf.
Proper proofing times are directly correlated to the activity of the starter and the temperature of the environment. Adjust proofing times based on these factors.
Ingredients and Substitutions
Sourdough bread, with its unique tang and texture, relies on a delicate balance of ingredients. Understanding the role of each component and the potential impact of substitutions is crucial for achieving desired results. This section delves into the essential ingredients, explores various substitutions, and highlights the consequences of these changes on the final product.Flour is the cornerstone of any sourdough recipe, and its type profoundly affects the outcome.
The protein content, gluten development, and starch structure all play a significant role in the bread’s texture, crumb, and overall flavor profile. Substitutions, while sometimes necessary, can introduce unexpected results. Careful consideration of these factors is vital for achieving the desired result.
Essential Ingredients
The core ingredients in sourdough recipes typically include flour, water, and sourdough starter. Flour provides the structure, water facilitates hydration, and the starter introduces the leavening and complex flavors. Beyond these basics, other components such as salt, and sometimes sweeteners, can significantly impact the bread’s final characteristics.
Flour Substitutions and Comparisons
Different types of flour offer varying characteristics, affecting the final product. Whole wheat flour, for example, introduces a robust, nutty flavor and a denser texture, while bread flour enhances gluten development for a chewier, more airy crumb.
Fueling your sourdough starter is a total game-changer for delicious recipes. Think beyond the usual bread, and dive into some seriously creative dishes. You can totally use your active sourdough starter in amazing ways, like adding a tangy twist to a sweet treat – try it with red hots chewy hearts cinnamon valentine candy for a unique Valentine’s Day treat! The possibilities are endless, unlocking a whole new world of culinary adventures with your sourdough starter.
- Whole Wheat Flour: Substituting whole wheat flour for a portion of bread flour can create a heartier, more robust loaf. However, the higher fiber content can result in a denser crumb and a slightly more rustic texture. A common substitution ratio is 1/3 whole wheat to 2/3 bread flour.
- Bread Flour: Bread flour, with its high protein content, is often preferred for its ability to develop a strong gluten network, leading to a more elastic and airy crumb. Substituting bread flour for all-purpose flour in a sourdough recipe generally improves the texture.
- All-Purpose Flour: All-purpose flour, a versatile option, is less likely to yield a strong, chewy crumb than bread flour. However, it can still be used in sourdough recipes, though the result might not be as airy.
Water Substitutions
Water’s role in sourdough is multifaceted. Its temperature influences the starter’s activity, and its hardness can affect the dough’s handling and the final bread’s flavor. Using filtered or spring water is often recommended to avoid potential mineral interference.
- Filtered Water: Using filtered water is generally recommended for removing impurities and potentially unwanted mineral tastes, allowing the natural flavors of the flour and starter to shine through.
Salt Substitutions
Salt plays a crucial role in sourdough, contributing to flavor complexity and dough structure. Using sea salt or kosher salt, in addition to table salt, can enhance the bread’s nuanced taste profile.
- Sea Salt or Kosher Salt: These salts often have more pronounced mineral notes compared to table salt, leading to a richer flavor experience in the final sourdough bread.
Common Mistakes in Ingredient Substitutions
When substituting ingredients, it’s crucial to understand their respective roles in the sourdough process. Incorrect substitutions can negatively impact the final outcome. Improper ratios or a lack of understanding can lead to disappointing results.
Impact on Texture and Flavor
Substituting ingredients can significantly alter the final product’s texture and flavor. For example, replacing bread flour with all-purpose flour may result in a less developed crumb structure. Adjusting hydration levels might also be necessary when substituting flour types.
Substituting ingredients requires careful consideration of the interplay between the various components.
Level up your sourdough game with these amazing recipes! Knowing how to navigate the world of baking with an active sourdough starter is key, but sometimes life throws curveballs. For instance, if you’re facing a dental issue like a root canal, understanding root canal prices with insurance can help you budget effectively. But don’t let that deter you – keep exploring the delicious possibilities of active sourdough recipes, and you’ll find your inner baker thriving!
Troubleshooting and Common Issues
Sourdough baking, while rewarding, can present challenges. Understanding common issues and their solutions is crucial for consistent success. This section provides troubleshooting techniques for various problems, from starter maintenance to recipe adjustments and baking failures. A keen eye and a methodical approach to problem-solving will lead to more satisfying sourdough results.
Starter Maintenance Issues
Maintaining a healthy sourdough starter is fundamental to successful baking. A sluggish or unresponsive starter can stem from several factors, requiring careful observation and adjustment.
- Starter Not Rising: Insufficient feeding or inconsistent feeding schedules are frequent culprits. Ensure the starter is fed regularly (typically every 12-24 hours, depending on the recipe) with the correct ratio of flour and water. Temperature fluctuations can also inhibit growth. Maintain a consistent environment for the starter, ideally between 75-80°F (24-27°C). If the starter shows signs of mold or other contamination, discard and start anew with fresh starter.
- Starter Developing an Unpleasant Odor: A sour or overly acidic smell may indicate an imbalance in the fermentation process or bacterial contamination. Reduce the frequency of feeding if the starter is overly active. Discard and restart with a fresh starter if the odor is persistent or if mold is visible.
- Starter Drying Out: Insufficient hydration during feeding can cause the starter to dry out. Ensure that the feeding water is at the correct temperature and that the starter is not exposed to direct sunlight or overly dry conditions. A well-hydrated starter will be more pliable and have a slightly moist, but not soggy, texture.
Troubleshooting Sourdough Recipes
Different sourdough recipes present unique challenges. Understanding the nuances of each recipe is vital for achieving optimal results.
- Loaf Collapse During Baking: Improper oven spring, inadequate proofing, or insufficient oven temperature can lead to a collapsed loaf. Ensure the dough is properly proofed before baking, using a reliable proofing method. A preheated oven with a Dutch oven or a similar method can help maintain a stable temperature and ensure even heat distribution during baking.
- Sour or Bitter Bread: Over-fermentation, excessive use of acidic ingredients (like vinegar), or poor starter quality can result in sour or bitter sourdough. Adjust the fermentation time to avoid over-fermentation. Use high-quality ingredients and ensure that the starter is healthy and well-maintained.
Dietary Adjustments
Sourdough lends itself well to dietary modifications. Adjustments can be made to accommodate various dietary restrictions or preferences.
- Gluten-Free Options: Gluten-free sourdough recipes are available, utilizing gluten-free flours. The techniques for mixing and proofing might differ from traditional sourdough recipes.
- Vegan Options: Vegan sourdough recipes can be easily adapted by using non-dairy milk and plant-based butter substitutes.
Advanced Sourdough Techniques
Mastering sourdough extends beyond basic recipes. Advanced techniques unlock a wider spectrum of flavors and textures, enabling bakers to create unique and impressive results. These techniques often involve manipulating fermentation times, incorporating specific ingredients, and employing innovative shaping methods.
Sourdough Pretzels
Sourdough pretzels offer a delightful twist on the classic treat, blending the tangy complexity of sourdough with the satisfying crunch of a pretzel. The key to achieving a satisfying result lies in the proper handling of the dough and the application of a robust pretzel salt solution.
- Dough Preparation: A slightly stiffer dough, compared to typical sourdough loaves, is ideal for pretzels. This dough should be well-developed, with a good gluten structure to hold its shape during the shaping and baking process. Properly mixing and kneading the dough develops gluten necessary for a satisfying bite. This dough should be allowed to proof for an extended period.
- Shaping: Forming pretzels involves a specific technique. After a final shaping stage, pretzels are often scored in a traditional pretzel pattern to enhance their visual appeal and promote even expansion during baking. Carefully shape the dough into pretzel-like forms, ensuring a consistent shape throughout. Be mindful to handle the dough gently.
- Baking: Baking temperature and time are crucial. A hot oven helps create a crisp exterior while maintaining a soft interior. Use a Dutch oven or other method to ensure even baking and to prevent the dough from drying out. The application of a strong salt solution is essential to achieve a crisp, salty exterior. The ideal salt solution will have a high salt concentration, for a salty exterior and a soft interior.
Sourdough Bagels
Sourdough bagels offer a unique blend of textures, combining the chewy interior of sourdough with the characteristic hole and crisp exterior of a traditional bagel. A crucial aspect is achieving a perfectly formed hole.
- Dough Development: A well-developed dough is crucial for a satisfying bagel. The dough needs to have sufficient gluten development to hold its shape and to create a nice texture. Use a recipe with a specific emphasis on the formation of gluten and maintain a good gluten structure. This will allow for the bagels to rise properly.
- Shaping and Boiling: The shaping of sourdough bagels involves creating a perfect hole in the dough. The dough should be formed into a bagel shape and then boiled in water with a small amount of salt. This helps create the signature bagel texture. This boiling process is critical for achieving the characteristic chewy interior and a crisp exterior.
- Baking: The baking process involves a hot oven to ensure a crisp exterior. The dough will rise after the boiling process, and then be baked to achieve the desired texture.
Unique Sourdough Breads
Expanding beyond pretzels and bagels, sourdough lends itself to a wide array of unique breads. The techniques for shaping and baking vary, but the foundational principles of sourdough fermentation remain consistent.
- Sourdough Rolls: Sourdough rolls can be made with various shapes and sizes. They offer a good opportunity to experiment with different shaping techniques and toppings. Proper gluten development and handling are crucial for achieving the desired texture.
- Sourdough Focaccia: Focaccia, a flatbread, benefits from the tangy notes of sourdough. The dough can be enriched with various herbs and toppings. A longer fermentation period allows for the flavors to deepen.
Sourdough Pancakes
Sourdough pancakes offer a unique sourdough experience, bringing a complex flavor profile to a breakfast staple. The tangy sourdough flavor is softened by the addition of other ingredients.
- Dough Preparation: The dough for sourdough pancakes typically incorporates buttermilk or other liquids to achieve a tender texture. The sourdough starter adds a unique tang and depth of flavor.
- Baking: The baking method for sourdough pancakes involves a medium heat and careful attention to the cooking time. The pancakes should be cooked until golden brown and cooked through.
Shaping and Baking Methods
Various shaping methods can be employed for different types of sourdough breads. These methods significantly impact the final product’s appearance and texture.
- Proofing Techniques: Proper proofing times are essential for achieving a well-risen dough. Techniques include shaping the dough after a proofing stage to maintain its structure. This helps to prevent the dough from becoming overly dense.
- Baking Methods: Various methods like baking in a Dutch oven, using a baking stone, or a conventional oven can be used to create a desirable crust and texture. The choice depends on the specific bread type and desired result.
Visual Representation of Recipes
Visual representations are crucial for understanding and replicating sourdough recipes effectively. Clear visuals can translate complex processes into easily digestible formats, aiding both novice and experienced bakers. This section focuses on different visual methods to enhance the learning and execution of sourdough recipes.Visual aids allow for a better comprehension of the recipe’s components, steps, and ideal conditions, thereby reducing the likelihood of errors and improving the baking outcome.
Sourdough Bread Recipe Table
A well-structured table outlining ingredients and steps is a fundamental visual aid. It allows bakers to quickly grasp the recipe’s requirements and follow the process sequentially.
| Ingredient | Quantity | Step |
|---|---|---|
| Sourdough Starter | 100g | Combine starter with flour and water. |
| Bread Flour | 300g | Mix ingredients until a shaggy dough forms. |
| Water | 200g | Knead the dough for 5-7 minutes. |
| Salt | 10g | Let the dough rest for 30 minutes. |
| Shape the dough into a loaf. | ||
| Proof in a warm place for 2-3 hours. | ||
| Preheat oven to 450°F. | ||
| Score the loaf and bake for 30-40 minutes. |
Sourdough Starter Ingredients
Understanding the composition of a sourdough starter is essential for achieving optimal results.
A sourdough starter is a naturally leavened mixture of flour and water, allowing wild yeasts and bacteria to multiply and develop a unique flavor profile. Key components include flour (e.g., bread flour, whole wheat flour), water (room temperature), and time. The flour type impacts the starter’s texture and flavor, while the consistency of the water plays a role in yeast growth.
Sourdough Leavening Process Infographic
A visual representation of the sourdough leavening process helps bakers visualize the stages and understand the importance of each step. A well-designed infographic should depict the different stages of fermentation, from initial mixing to the final rise, highlighting the key factors that influence the process.(Imagine a simplified infographic here depicting the stages of sourdough leavening, including initial mixing, bulk fermentation, shaping, and proofing, with arrows and labels indicating the progression.)
Ideal Proofing Environment Diagram
A diagram illustrating the ideal proofing environment provides crucial information for achieving a well-risen loaf. This includes factors such as temperature, humidity, and air circulation.(Imagine a diagram here illustrating a proofing environment with a temperature range of 75-80°F, moderate humidity, and adequate air circulation, with a visual representation of a sourdough boule in the environment.)
Visual Characteristics of a Well-Risen Sourdough Loaf
A well-risen sourdough loaf displays specific visual characteristics that indicate proper fermentation.A well-risen sourdough loaf will exhibit a significant increase in volume, typically showing a full, rounded shape with a slightly domed top. The texture will appear airy and slightly elastic. The crust will have a distinctive, often darker color, developing a crackled pattern as it bakes. The interior will be evenly colored and exhibit a soft, spongy texture.
An experienced baker can often discern the flavors and aromas present from the loaf’s appearance.
Final Wrap-Up
Unlocking the secrets of sourdough baking can be a rewarding journey. This guide provides a solid foundation for beginners and seasoned bakers alike. Whether you’re after a healthy alternative to traditional bread or simply want to explore the fascinating world of fermented foods, this collection of recipes with active sourdough starter will be a valuable asset.
Clarifying Questions: Recipes With Active Sourdough Starter
What’s the difference between white and rye sourdough starters?
White starters are generally easier to maintain, using flour and water. Rye starters, on the other hand, are more robust, requiring less frequent feeding. The flavour profiles differ significantly.
How long does it take to make a sourdough starter from scratch?
Sourdough starter development takes time. It can take several weeks for the starter to become active and reliably rise. Patience is key.
Can I use different flours in sourdough recipes?
Absolutely! Different flours will impact the texture and flavour. Whole wheat, rye, and even spelt flour can be used. Experiment to find your perfect combination.
What should I do if my sourdough starter isn’t rising?
Several factors can affect sourdough starter activity, including temperature, hydration, and feeding frequency. Check your feeding schedule and ensure your environment is appropriate.
